source: https://osxdaily.com/2018/03/07/how-install-homebrew-mac-os/
Advanced Mac users may appreciate using the Homebrew package manager, which greatly simplifies the process of installing command line software and tools on a Mac.
For example, if you want to easily install favorite command line tools on a Mac like cask, htop, wget, nmap, tree, irssi, links, colordiff, or virtually any other familiar unix command line utility, you can do so with a simple command. Homebrew downloads and builds the package for you.
This is obviously aimed at more technically savvy Mac users who spend a lot of time at the command line. While there’s no particular issue for novice users installing Homebrew on their Mac, the odds of novices finding it useful are slim, unless they intend to embark on learning the command line environment. Contrast that to power users who practically live in a terminal environment, whether longtime Mac users or migrating to the platform from the Windows or Linux world, who will immediately see the value of Homebrew.
Requirements for Installing Homebrew on Mac OS
prerequisites to installing Homebrew on a Mac include the following:
- A Mac running Mac OS X 10.10 or later, though earlier versions are sort of supported
- Command Line Tools must be installed on the Mac (either independently or through Xcode)
- Knowledge of the command line and using bash or zsh
Assuming you’re interested in installing Homebrew and meet those requirements, then the rest is equally straight forward.
How to Install Homebrew on Mac OS
The simplest way to install Homebrew is through ruby and curl, accomplished with a single command. This approach is the same for installing Homebrew in all supported versions of Mac OS and Mac OS X.
- Open the “Terminal” application, found in /Applications/Utilities/
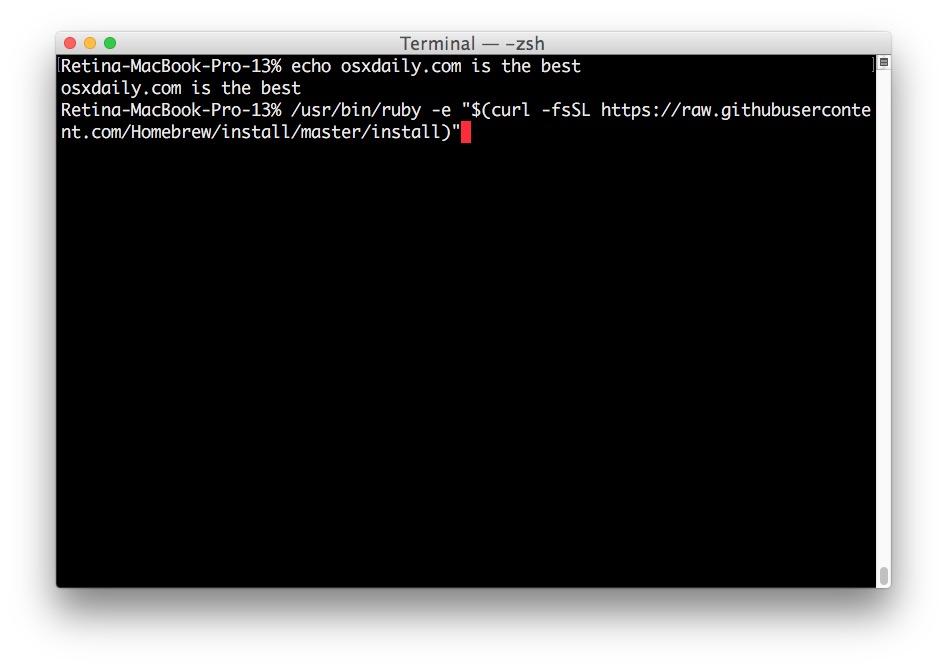
- Enter the following command into a single line of the terminal:
- Hit Return and you’ll see a series of lines about what the script will install and where, hit Return again to agree or hit Escape to cancel
- Enter the administrator password (required by sudo execution) to begin installation
For MacOS Catalina, macOS Mojave, and MacOS Big Sur:/bin/bash -c "$(curl -fsSL https://raw.githubusercontent.com/Homebrew/install/master/install.sh)"
For macOS High Sierra, Sierra, El Capitan, and earlier:/usr/bin/ruby -e "$(curl -fsSL https://raw.githubusercontent.com/Homebrew/install/master/install)"
Installation of Homebrew will take a while depending on the speed of your Mac and internet connection, as each necessary package is downloaded and installed by the script.
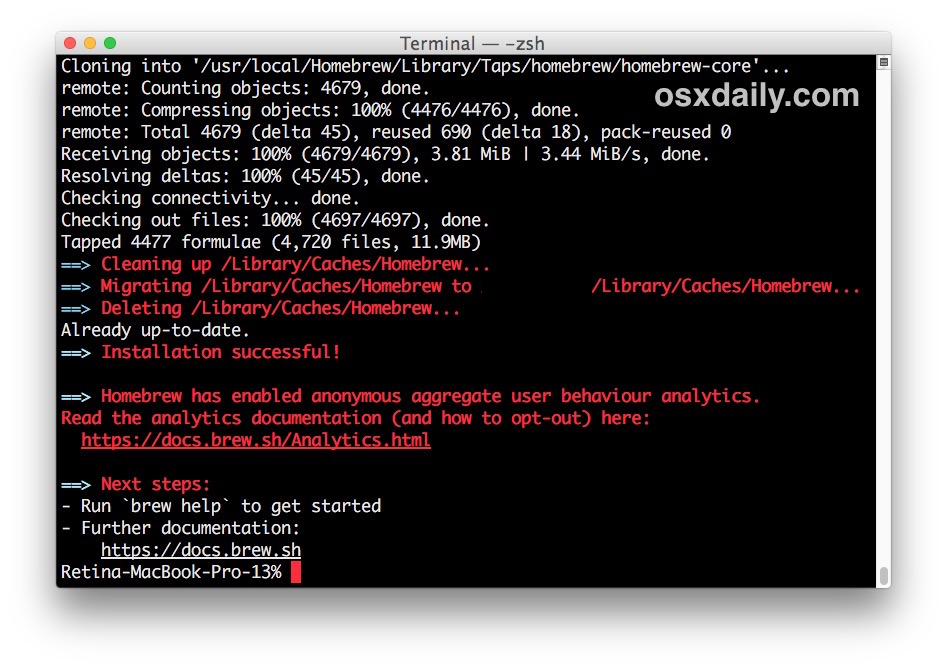
When complete, you will see an “Installation successful!” message.

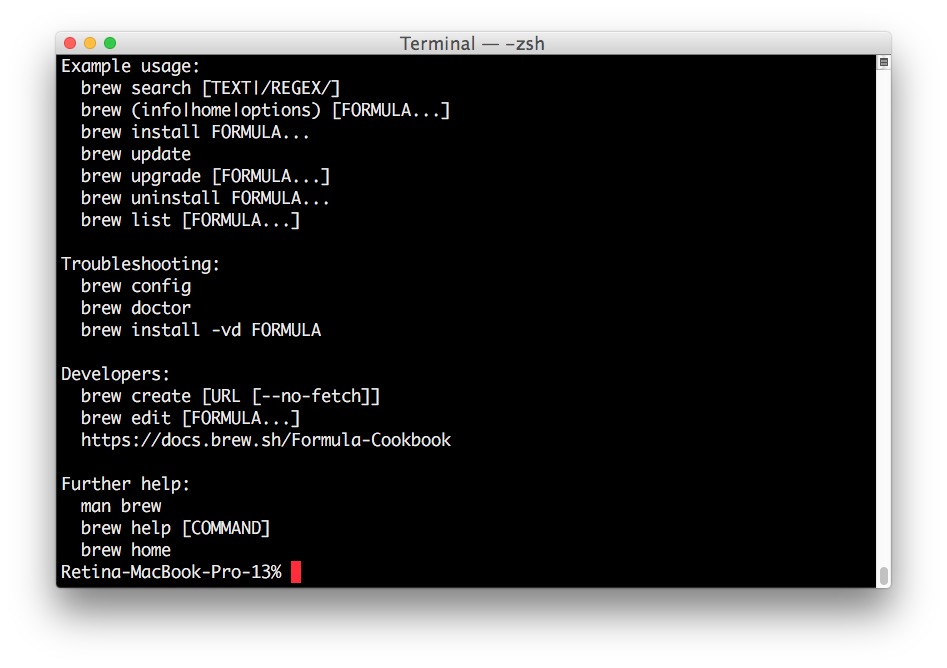
Now you’re ready to install software packages through Homebrew, or you can read the help documentation with the following command:
brew help

Installing Software Packages through Homebrew on Mac
Installing packages with Homebrew is super easy, just use the following syntax:
brew install [package name]
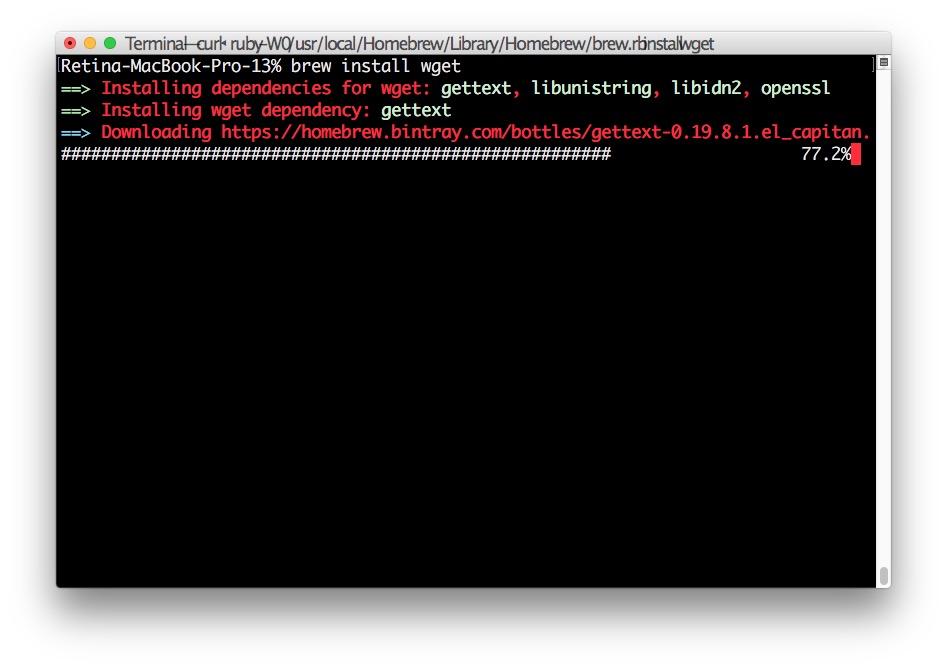
For example, to install wget through Homebrew you could use the following syntax:
brew install wget
Simple, easy. Once complete you can run wget as usual.

A quick side note; Homebrew is not the only way to install command line software, you can install command line tools on a Mac yourself and then compile and make software independently. For example, we discuss installing wget on Mac OS without Homebrew here and it uses the typical configure and make process. There’s nothing wrong with that approach (and arguably it might be preferable for users who want limited packages and a slimmer footprint) but if you’re accustomed to a package manager like dpkg, apt-get, or rpm you’ll almost certainly appreciate and prefer to use Homebrew.
How to Disable Homebrew Analytics Tracking
Homebrew now defaults to using anonymized behavioral analytics tracking. If you do not want to participate in that or you’d just rather disable the feature to reduce network traffic or for privacy purposes, or whatever other reason, you can run the following command after successfully installing Homebrew on a Mac. This will opt out of Homebrew analytics:
brew analytics off
Hit return and after a moment or so the analytics tracking in Homebrew will be disabled.
How to Remove HomeBrew from a Mac
If you have installed Homebrew but later decide you want to remove Homebrew from a Mac for some reason or another, you can uninstall it with another ruby script run from the command line, choose the script that aligns with your version of MacOS:
Removing Homebrew in MacOS Catalina, macOS Big Sur, and MacOS Mojave:
/bin/bash -c "$(curl -fsSL https://raw.githubusercontent.com/Homebrew/install/master/uninstall.sh)"
Removing Homebrew from MacOS High Sierra, Sierra, El Capitan, and earlier:ruby -e "$(curl -fsSL https://raw.githubusercontent.com/Homebrew/install/master/uninstall)"
Alternatively, you could download that “uninstall” script directly and run it yourself.
Enjoy Homebrew!
No comments:
Post a Comment