Rsync for windows or any other good sync program should be able to determine the time zone and handle that as part of the sync process.
also see
Suresync from a company called www.softwarepursuits.com file sync
Works good. has scheduling and synching of directories of your choice.
Very flexible. A demo should be available.
also
Folder synchronization
http://www.plaxoft.com/en/products/foldersync/P027BAA01-5ECB-4F9B-98FD-92B152620B7D.php3
http://www.foldermatch.com/
http://www.foldermatch.com/fmcompetitors.htm
http://www.juul.stejle.dk/article.asp?DocumentID=182
http://geekman.subportal.com/sn/Utilities/File_Synchronizing_Utilities/
------------------------------------------------------------------------------
Here's a link to the RSYNC Project:
http://rsync.samba.org/
Here's the Novell RSYNC forum:
http://forge.novell.com/modules/xfmod/newsportal/thread.php?group_id=1148&group=novell.forge.rsync.help
And here's a good resource for RSYNC on Windows:
http://art.wilderness.org.au/software/help_cygwin-rsync.shtml
Here are two more good RSYNC Windows links:
http://www.itefix.no/phpws/index.php?module=pagemaster&PAGE_user_op=view_page&PAGE_id=6&MMN_position=23:23
http://www.nasbackup.com/
The NASBackup Project is a neat Open Source effort to make a gui-based RSYNC client for Windows. It works very well.
Article Orginal Source: http://www.experts-exchange.com/Software/System_Utilities/Remote_Access/VPN/Q_22767967.html
Monday, November 30, 2009
How to use offline files in Windows XP
Configuring your computer to use Offline Files
To configure your computer to use the Offline Files feature:
Click Start, and then click My Computer.
On the Tools menu, click Folder Options.
Click the Offline Files tab.
Select the Enable Offline Files check box, and then click OK.
Back to the top
Making files or folders available offline
To make shared network files or folders available when you are offline:
Click Start, and then click My Computer.
Click My Network Places.
Double-click the network place that contains the folder or file that you want to make available offline.
Right-click the file or folder that you want, and then click Make Available Offline. The Offline Files Wizard starts. Click Next to continue.
Select the Automatically synchronize the Offline Files when I log on and log off my computer check box, and then click Next.
Select the Create a shortcut to the Offline Files folder on my desktop check box, and then click Finish. The files are copied to your computer, and a "Shortcut to Offline Files" folder is displayed on the desktop.
NOTE: When you make other files available offline, they are displayed in the "Shortcut to Offline Files" folder.
It is also possible to use offline files with third party servers if they have SMB (Server Message Block) protocol installed. With the SMB protocol, you can use this feature from heterogeneous servers, such as Netware and UNIX.
Ensure that your network administrator has setup your UNIX or Netware servers to use the SMB protocol to share files on the network. They can use a product, Samba, for example, to setup SMB on your servers. Once SMB is running on the server, you can use Windows XP to connect to those files and make them available offline like you would if the server was a Windows-based server.
Article Orignal Source: http://support.microsoft.com/kb/307853
Setting up SSL with a SelfSSL certificate on Windows Server 2003
"If you set a host header in IIS and you specify that name in SelfSSL you will NEVER see a security warning (because the name of the certificate and the server matches).
Now if you try to access the site from another computer, you WILL get a security warning (not from a trusted authority). This can be avoided if you export the certificate to a file and then import it on the computer from which you want to access the site.
In fact, using self-signed certificates is a great way to ensure your intranet is just as safe as using a 'paid for' certificate - what can be more safe than a certificate that has never left the building - it's guaranteed, that no one has changed it on its way."
Method:
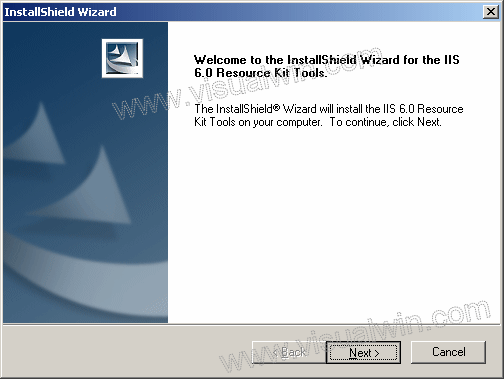
Run iis60rkt.exe. You will see the welcome screen - click Next
In the next dialog, read over the EULA and select "I agree" and press Next. In the next dialog, you can usually just press "Next" because your information is usually entered already.
Now in this next dialog, select "Custom" and press "Next"
Here you can change the path of where it installs, just click Next. In the next dialog we have an option of what we can install. In this tutorial I will only be installing "SelfSSL" so I will unselect everything else. You can install whatever looks interesting, if you wish.
Now you will be presented with an overview, you can click "Next" and the install will copy the selected files. When that's done, click "Finish"
Now we will create a certificate. Click Start -> All Programs -> IIS Resources -> SelfSSL -> SelfSSL
Type "selfssl /T", without the quotes and press "y" when prompted. Rocky reported that if you type "selfssl /T /N:CN=" then you will only be prompted once in Internet Explorer to accept the certificate. Thanks Rocky
Now load "https://localhost" in Internet Explorer, and click "Yes" to view a secure site. You will be presented with the following warning:
That is because SelfSSL makes a certificate only meant to be used in testing. The connection will still be a secured one, but every time you load it you will get that message.
That's all! I hope you found this information useful.
Orginal Site: http://www.visualwin.com/SelfSSL/
Now if you try to access the site from another computer, you WILL get a security warning (not from a trusted authority). This can be avoided if you export the certificate to a file and then import it on the computer from which you want to access the site.
In fact, using self-signed certificates is a great way to ensure your intranet is just as safe as using a 'paid for' certificate - what can be more safe than a certificate that has never left the building - it's guaranteed, that no one has changed it on its way."
Method:
Run iis60rkt.exe. You will see the welcome screen - click Next
In the next dialog, read over the EULA and select "I agree" and press Next. In the next dialog, you can usually just press "Next" because your information is usually entered already.
Now in this next dialog, select "Custom" and press "Next"
Here you can change the path of where it installs, just click Next. In the next dialog we have an option of what we can install. In this tutorial I will only be installing "SelfSSL" so I will unselect everything else. You can install whatever looks interesting, if you wish.
Now you will be presented with an overview, you can click "Next" and the install will copy the selected files. When that's done, click "Finish"
Now we will create a certificate. Click Start -> All Programs -> IIS Resources -> SelfSSL -> SelfSSL
Type "selfssl /T", without the quotes and press "y" when prompted. Rocky reported that if you type "selfssl /T /N:CN=
Now load "https://localhost" in Internet Explorer, and click "Yes" to view a secure site. You will be presented with the following warning:
That is because SelfSSL makes a certificate only meant to be used in testing. The connection will still be a secured one, but every time you load it you will get that message.
That's all! I hope you found this information useful.
Orginal Site: http://www.visualwin.com/SelfSSL/
Subscribe to:
Posts (Atom)